
How To Make A Simple Sawhorse Table
- Pete
- Apr 16, 2018
- 5 min read

I'm always short of work surfaces when I'm cleaning the shop, working on a project or taking apart a tool. I didn't want to commit to a permanent workbench, so I build these simple sawhorses and added a removable plywood top.
The sawhorses are all cut from 3 8-foot 2x4's and the top is two 2'x4, piece of half-inch plywood laminated together. Everything is fastened together with 3" drywall screws and 1-1/2" #6 woodscrews.
For this project you will need:
(3x) 8-foot long 2x4s
(2x) 2' x 4' sheets of 1/2" thick plywood
3" long drywall screws
1.5" #6 wood screws
3" long 1/4"-20 hex bolts
1/4 Hex Nuts, or thumbscrews
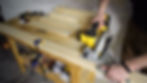
I started with 3 8-foot long 2x4s from the home center. These sawhorses are designed to optimize the use of material, so there really isn't a lot of scrap leftover. Make sure to get 8-foot boards, not the 7-footers... don't ask how I know... I broke down the boards using a circular saw and speed-square, but a miter saw would work as well.
Breaking Down Materials
I wanted the total height to match another workbench I have, which is 29.5" tall. So the legs are 24", sit on top of the legs, for another 3.5" and the top is 1" thick to give my total height of 29.5". The top is 21" wide, with a 3" overhang. The stretchers between the legs are 18" long, and the feet are 15" long.
The Cut List:
Board 1: 24" (2x) ; 15" (3x)
Board 2: 24" (2x) ; 18" (2x)
Board 3: 21" (2x) ; 18" (2x) ; 15" (1x)
After cutting, I smoothed the rough edges with a wood rasp.
Mark Out Cuts for Supports
You could attach the stretchers flat against the inside of the legs, but that relies on the strength of the screws alone, and will come loose with time and use. So I marked out a notch at the top of the legs to accept the stretcher, and another at the bottom of the leg for the lower stretcher. The top notch is 1.5" x 3.5" at the end of the board. The lower notch is 1.5" x 3.5" and the bottom edge is located 5" above the bottom of the leg.

Cut Out the Notches
With the waste marked out, move over to the bandsaw and cut out the notches. You can also use a handsaw or circular saw and a chisel to clear out the waste, but I found this good practice in cutting out interior corners on the bandsaw.
For the top stretcher, I cut the long surface first and then cross cut to remove the block. On the lower stretcher, cut the two edges first, back the blade out slightly and rotate the piece around to cut the bottom of of the notch along the grain. Flip the piece over and clear out the second corner.


Assemble the Legs
If the cutouts are a nice tight fit you won't need any clamps to pound the legs and stretchers together. Check for square between the legs and stretchers and make any adjustments now. Then, pre-drill for a 3" drywall screw and screw the legs to the stretchers. I drove two screws through the legs, and then a third screw in the opposite direction, through the stretcher first. Repeat this at all four corners.
Cut the Top to Width
Moving over to the two 2'x4' pieces of 1/2" thick plywood, clamp them together and mark out a line 3" from one edge. The remainder will be two 21" wide pieces, these will make the work surface. You'll need the two strips 3" wide and the full 4' length to make the remaining parts of the sawhorses and tabletop. I clamped an extra 2x4 down to serve as a straight edge for the saw and made the cut in one pass. A tablesaw would also work, but I don't like handling sheet goods on the table if I don't have to.


Attach the Feet to the Legs
Take one of the 3" wide strips and mark off 8 6" long pieces. Cut these off using the circular saw and speed square. They will be used to connect the legs to the feet... let's call them ankles. Clamp on of the leg assemblies down, and line up the foot. To center the 15" foot on the 3.5" wide leg, the overhang should be 5.75". Clamp one of the ankle brackets just cut to the inside of the legs. Then drill and countersink holes for a #6 wood screw and screw the pieces together. I used 8 screws in total for each bracket, and put brackets on the inside and outside of each leg.
You could also come back and toe-nail screw the leg into the foot for some added strength. Pocket holes would work too, but whatever you decide, add the braces.
Attach the Top Plate
I deviated a little bit from my original design Instead of centering the top plate on the sawhorse, I slid it all the way to one side. This gave a slightly larger overhang for clamping to, but also left a vertical surface on the other leg. Here you can clamp boards vertically to work on the edges, for example when planing and edge or notching a door for hinges.

Drill and countersink holes for the 3" drywall screws. Put two screws into each leg, (one in the leg and one in the stretcher) and then three more screws along the length of the stretcher.

Cut and Glue the Table Cleats
Using the other 3" long strip of plywood, mark off two pieces the same width as the table top, and cut them to length. They should be 21" long, the same as the top plate of the sawhorse. Glue these off cuts on to the underside of the work surface, and clamp them in place. I got impatient and tacked them in place using some 3/4" brad nails and a nail gun... but that's me. Glue is completely sufficient.

Spread glue over one of the sheets of plywood. I used plywood with one good surface, so make sure to glue the 'bad' surfaces together. Flip the second piece of plywood onto the other and line up the edges. Since they were cut at the same time, all the edges should line up nicely. Clamp the edges and or tack them in place with some 3/4" brad nails.
With the two surfaces laminated together, flip the top over and you can see how the guide cleats help line up the table top with the sawhorses.
Drill and Attach the Table Top
Mark a line 4" from each short end of the table top and make marks 6" in from each edge. These are the spots to drill through the table top and through the top plate of the sawhorses to hold the top down. First, using a 1/2" forstner bit, or a spade bit, drill a pocket at least 1/4" deep. I went down through the first layer of plywood, a full 1/2".

Then come back with a 1/4" drill bit and drill all the way through the table top and through the top plate below. Press in the 1/4-20 hex bolts through the holes, you might need to motivate them with a hammer. Or drill the holes a little over-sized. I didn't, but you probably should.
Finally, secure the table top in place using a nut, wingnut, thumbscrew or these 3D printed knobs that I made previously. You can read the Instructable here.
The Finished Product
That's it, simple sawhorses and a simple table top that you can use for a workbench, desk or anything else around the shop. I'll probably use this as a drying table for most projects, but I've got some machine rebuilds coming up that the extra space will be helpful for keeping all the parts organized.

I hope you found this helpful, and maybe inspired you to modify your own workspace for your needs.
Thanks for reading!